
Scheduling automatic executions
With GoAMS schedules, you can program your processes to run automatically at specific times and frequencies. In this tutorial, you will learn how to create schedules, configure frequency using preset options or cron expressions, and let everything run on autopilot.
What is a schedule?
A schedule is a configuration that defines when and how often a process should run. When the scheduled time arrives, GoAMS automatically creates a Job and sends it to the assigned Runner. You don't need to do anything manually — just configure it once.
Schedules screen
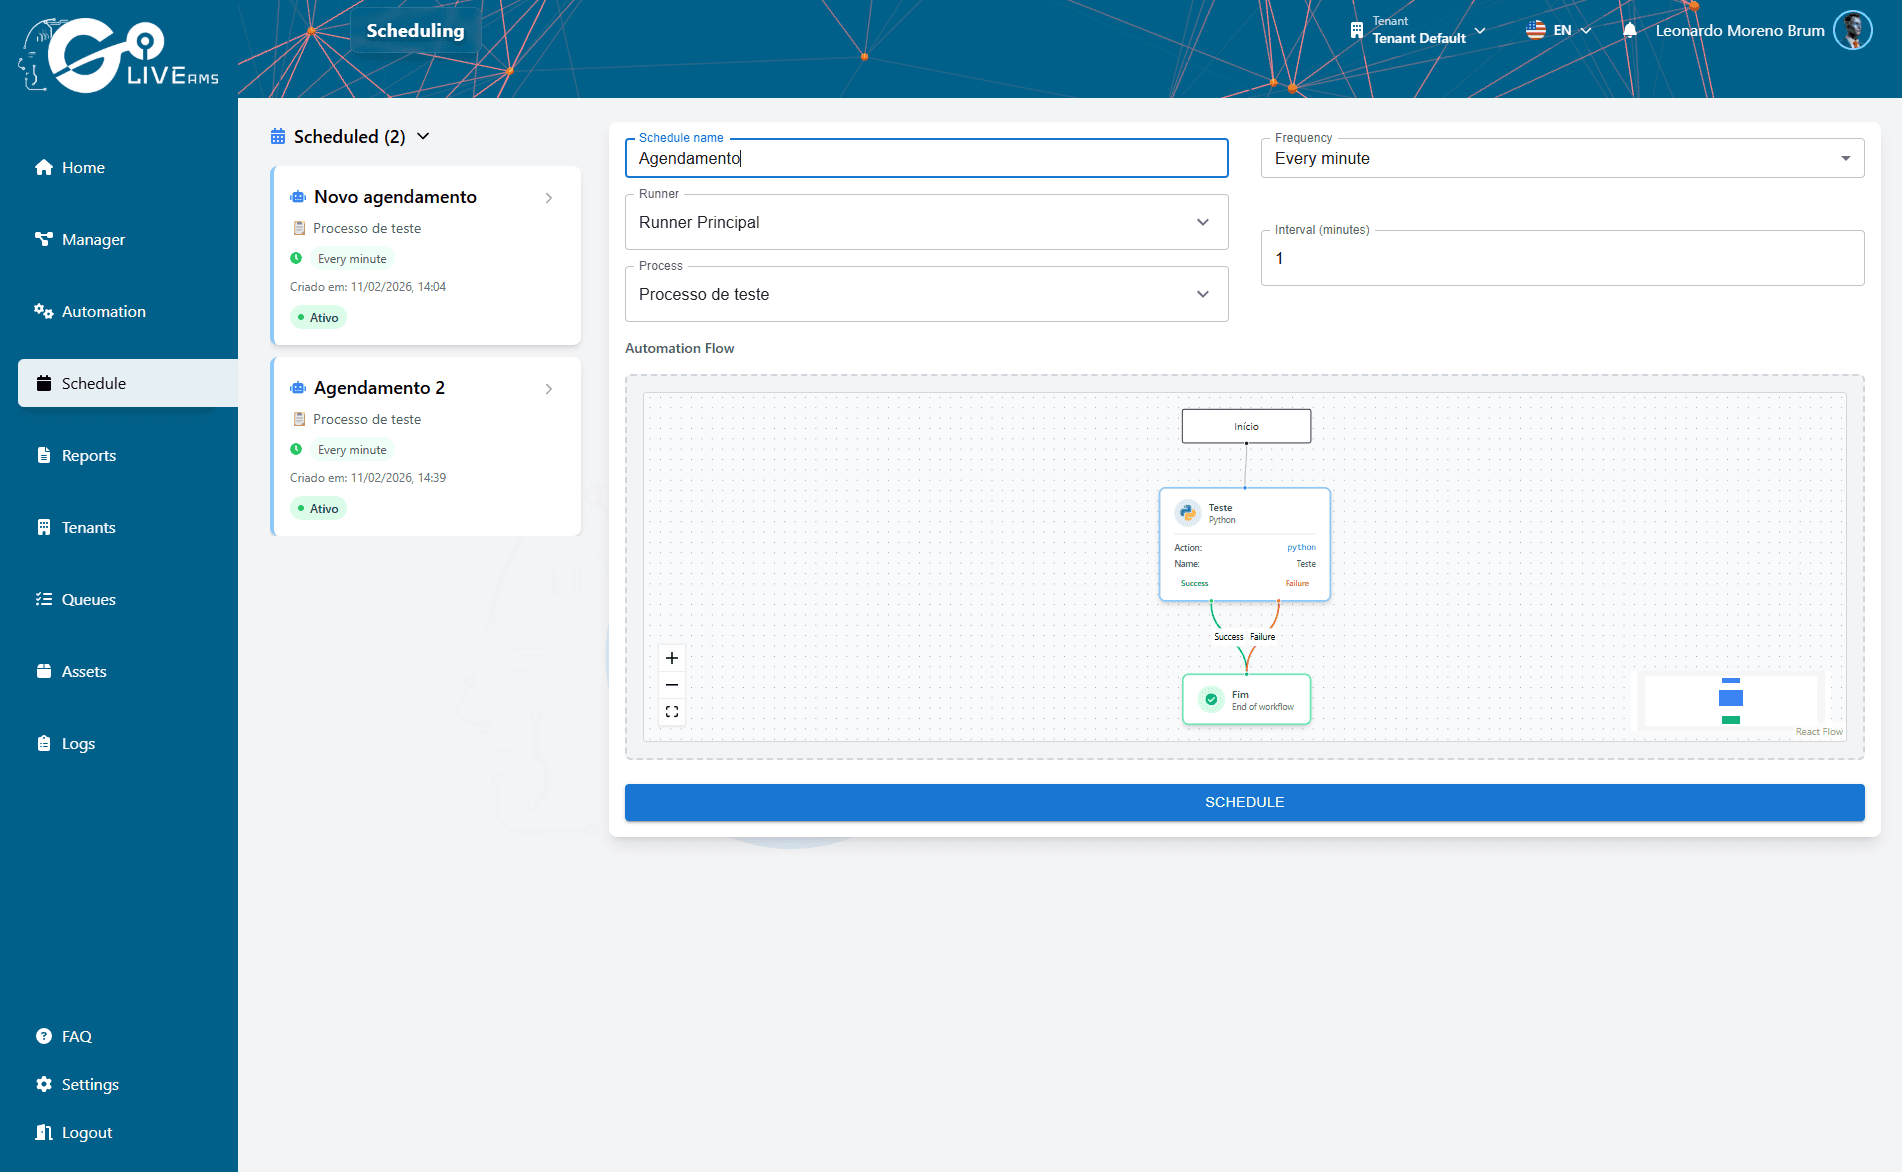
In the Schedules section of the GoAMS dashboard, you will find the list of all your schedules. Each schedule shows the name, linked process, assigned Runner and configured frequency. From this screen you can create new schedules, edit or disable existing ones.
Creating a new schedule
Step 1: Go to the Schedules section
In the GoAMS dashboard, go to the Schedules section. You will see the list of existing schedules.
Step 2: Click to create a new schedule
Click the button to add a new schedule. A form will appear.
Step 3: Fill in the schedule details
Enter the basic information:
- Name — a descriptive name to identify the schedule
- Process — select which process will be executed
- Runner — select which Runner will execute the process
Step 4: Configure the frequency
Define when the process should run. You can use the preset options or manually configure a cron expression.
Step 5: Save the schedule
Review the information and save. The schedule will be active and will automatically create Jobs at the programmed times.
Configuring frequency
GoAMS offers two ways to configure when the process should run:
Preset options
Choose one of the ready-made options for quick setup:
Every hour — runs the process every 60 minutes
Daily — runs once per day at the chosen time
Weekly — runs on specific days of the week
Monthly — runs on a specific day of the month
Cron expression (advanced)
For more specific configurations, you can edit the cron expression directly. The cron expression is generated automatically when you choose preset options, but can be manually adjusted for custom scenarios.
Format: minute hour day-of-month month day-of-week
0 9 * * * — Every day at 9 AM
0 8 * * 1-5 — Monday to Friday at 8 AM
30 18 1 * * — 1st of each month at 6:30 PM
*/15 * * * * — Every 15 minutes
Tip
You don't need to memorize cron syntax. Use the preset options and GoAMS generates the expression automatically. Manual editing is only for those who need very specific frequencies.
How it works
After creating the schedule, the flow is automatic:
GoAMS monitors active schedules
When the scheduled time arrives, a Job is automatically created
The Job is sent to the assigned Runner
If the Runner is online, execution starts immediately
You can track generated Jobs in the Jobs section
Important
If the Runner is offline at the scheduled time, the Job will be created with "Pending" status and will execute as soon as the Runner comes online.
Summary
To schedule automatic executions:
- 1
Go to the Schedules section in the GoAMS dashboard
- 2
Create a new schedule with name, process and Runner
- 3
Configure the frequency (preset options or cron expression)
- 4
Save the schedule — Jobs will be created automatically
- 5
Track the generated Jobs in the Jobs section
Next steps
With schedules configured, you can: