
Creating a process and building the workflow
A process in GoAMS is an automation that the Runner executes. Each process has a workflow — a visual flow where you create actions (tasks) and connect them with conditions, defining what happens on success or failure. In this tutorial, you will learn how to create a process from scratch and build its workflow.
What is a process?
A process is the main unit of automation in GoAMS. It groups a complete workflow that the Runner will execute. Think of the process as the project, and the workflow as the execution flow within it.
Processes screen
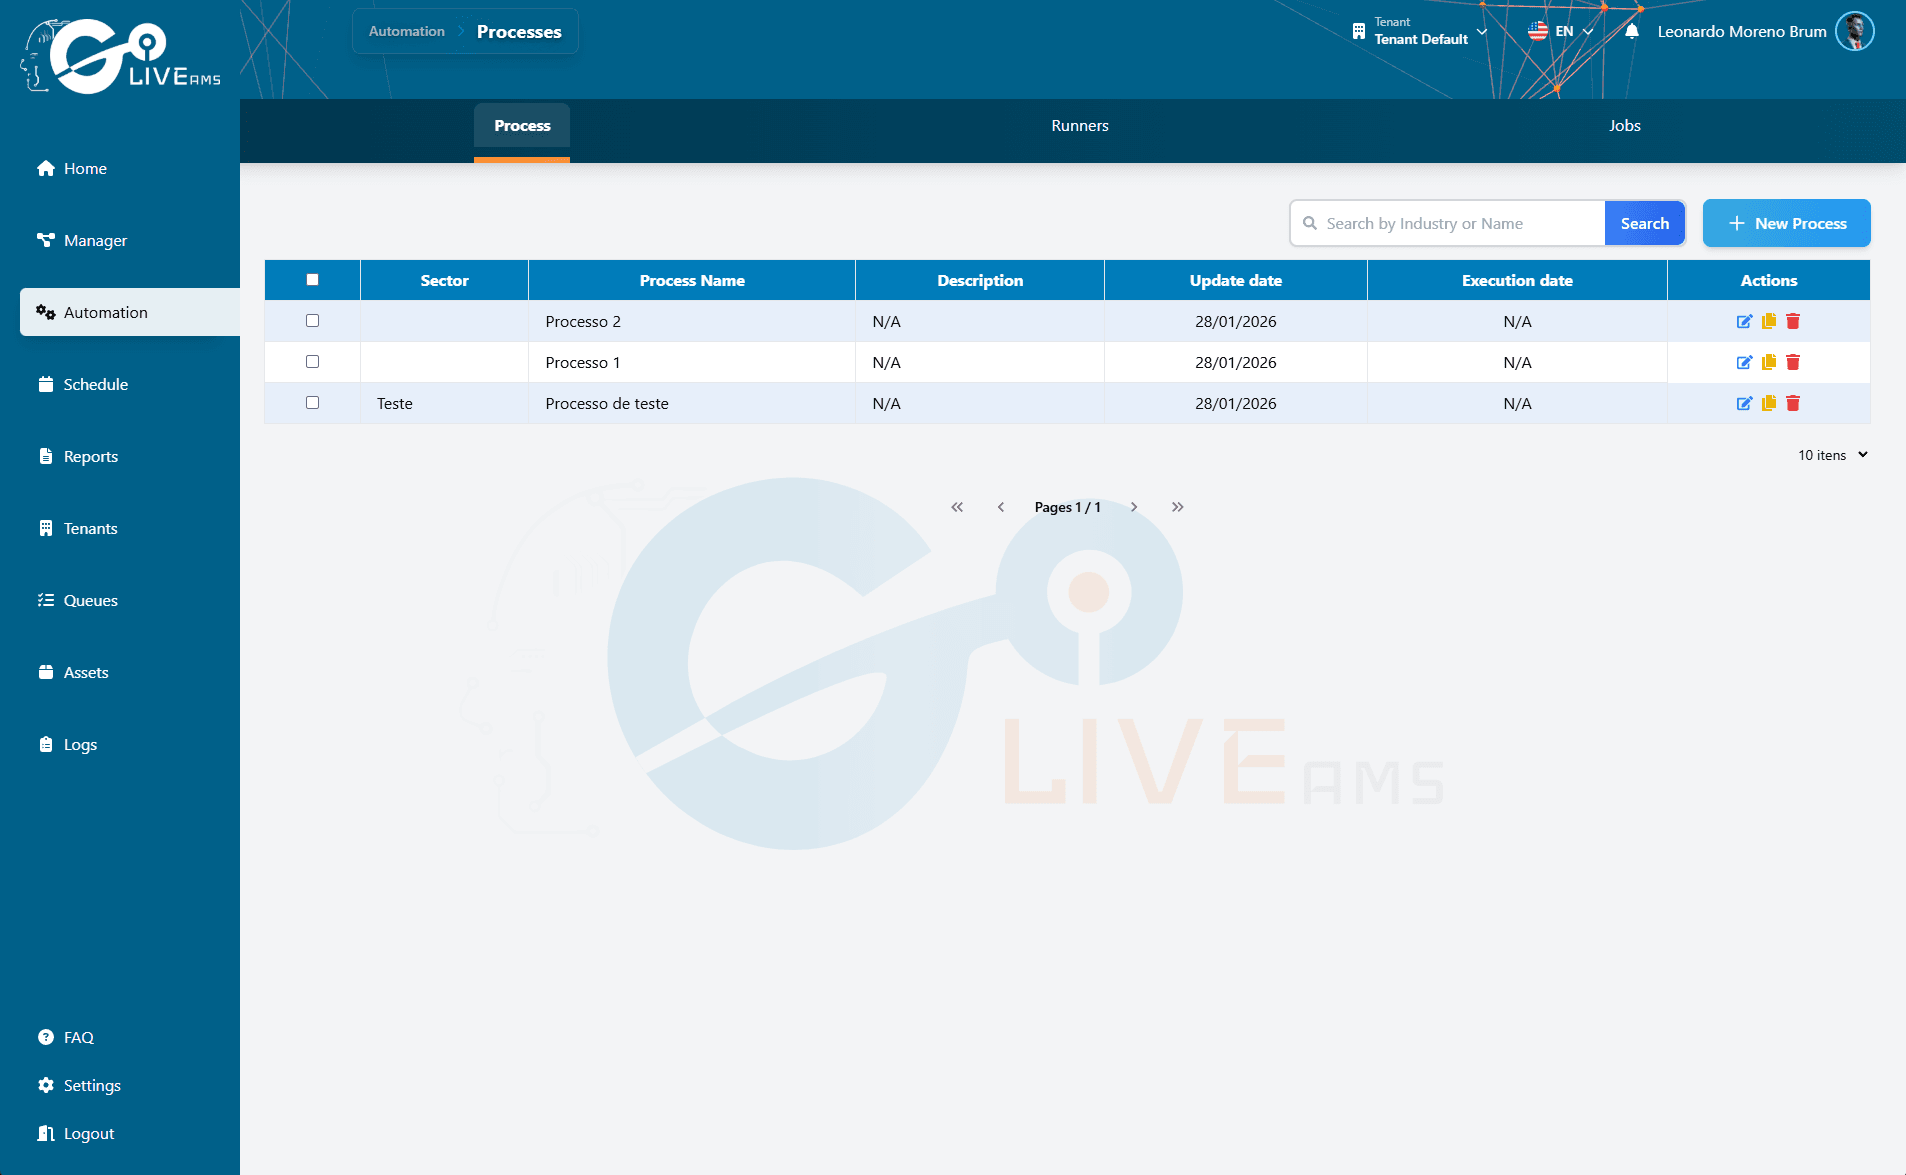
When you access the Processes section in the GoAMS dashboard, you will see the list of all processes already created. From this screen you can create new processes, edit existing ones or view the workflow of each one.
Creating a new process
Step 1: Go to the Processes section
In the GoAMS dashboard, go to the Processes section. You will see the list of existing processes.
Step 2: Click to create a new process
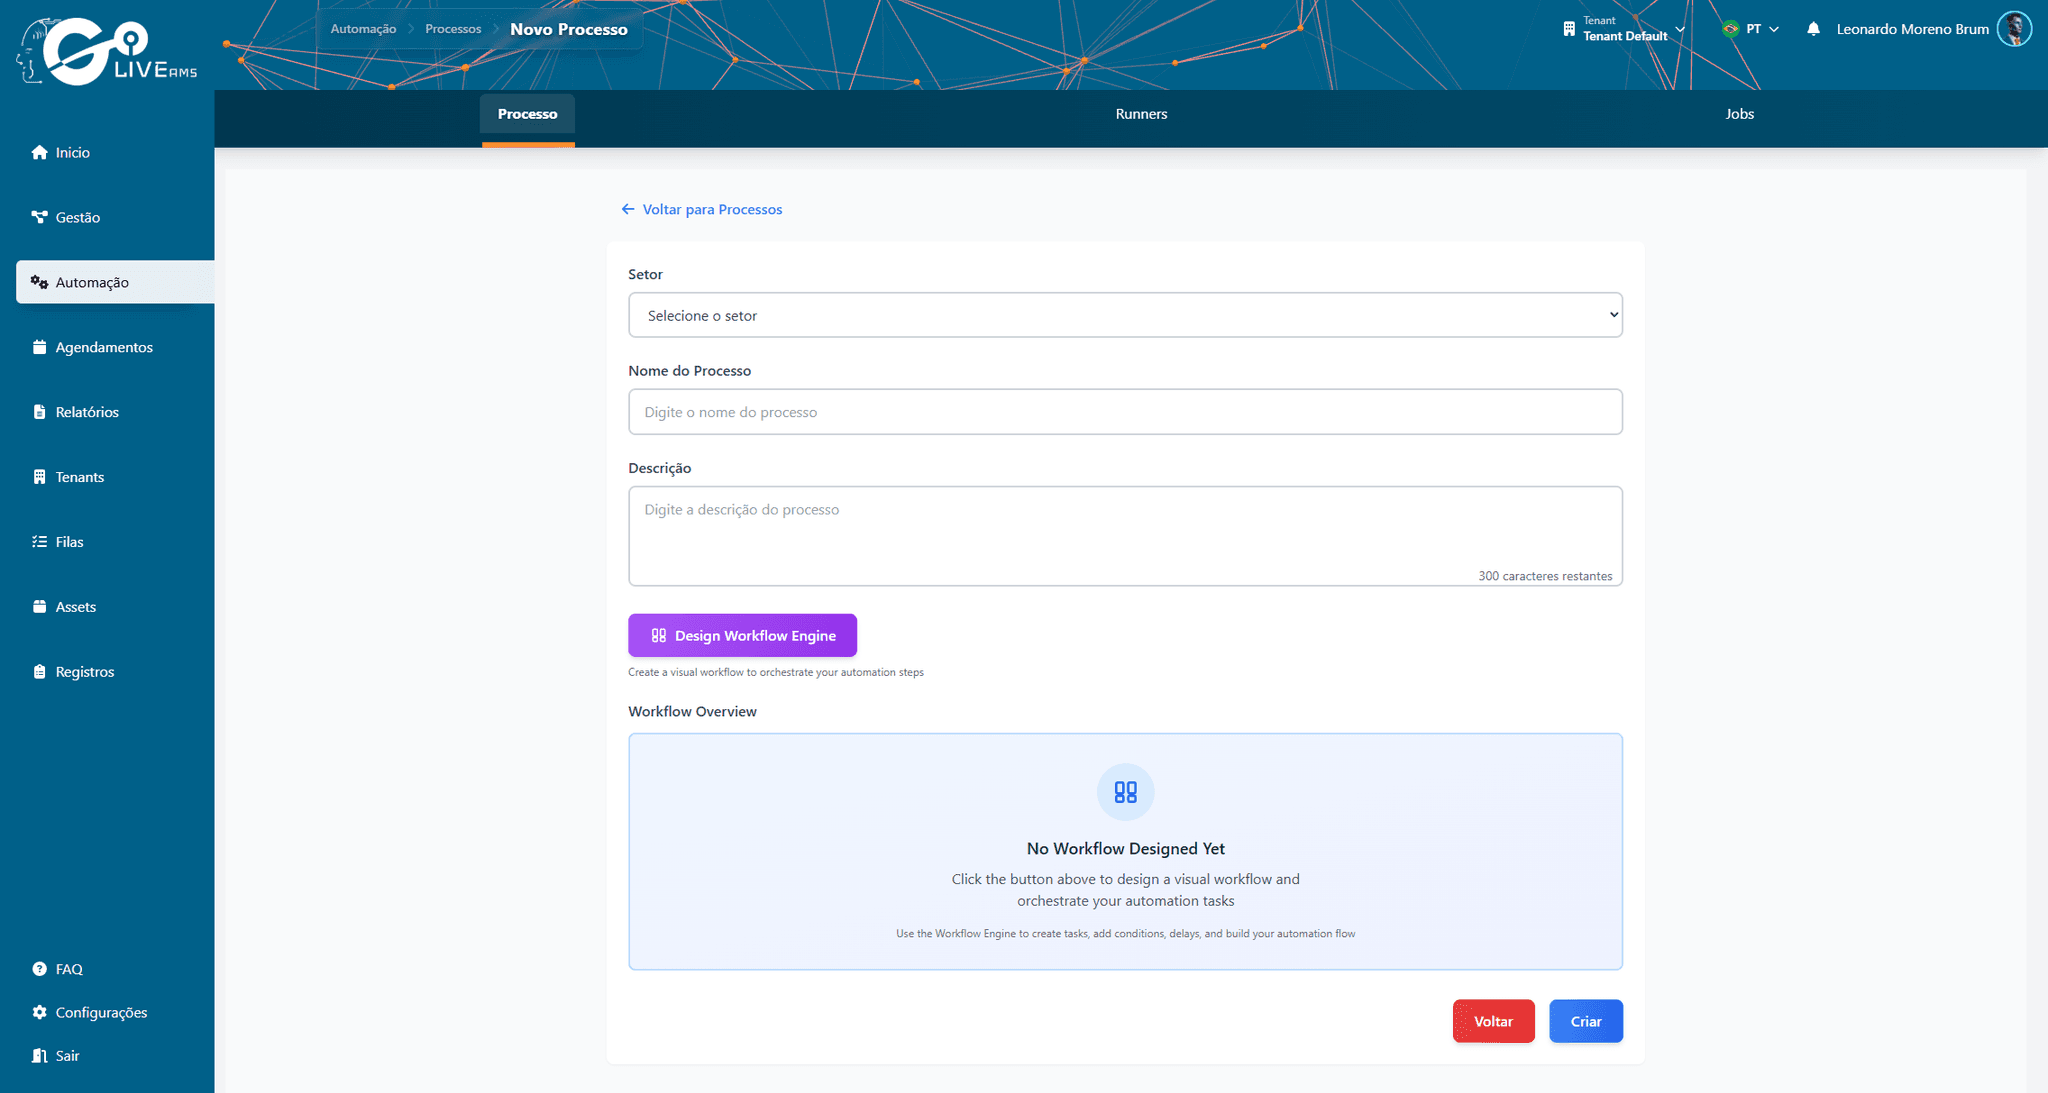
Click the button to add a new process. A form will appear.
Step 3: Fill in the process details
Enter the basic process information:
- Name — a clear and descriptive name for the process
- Description — briefly explain what the process does (optional)
- Sector — select the related sector or area (optional)
Step 4: Save the process
After filling in the details, save the process. It will appear in the process list and will be ready to receive the workflow.
Building the workflow
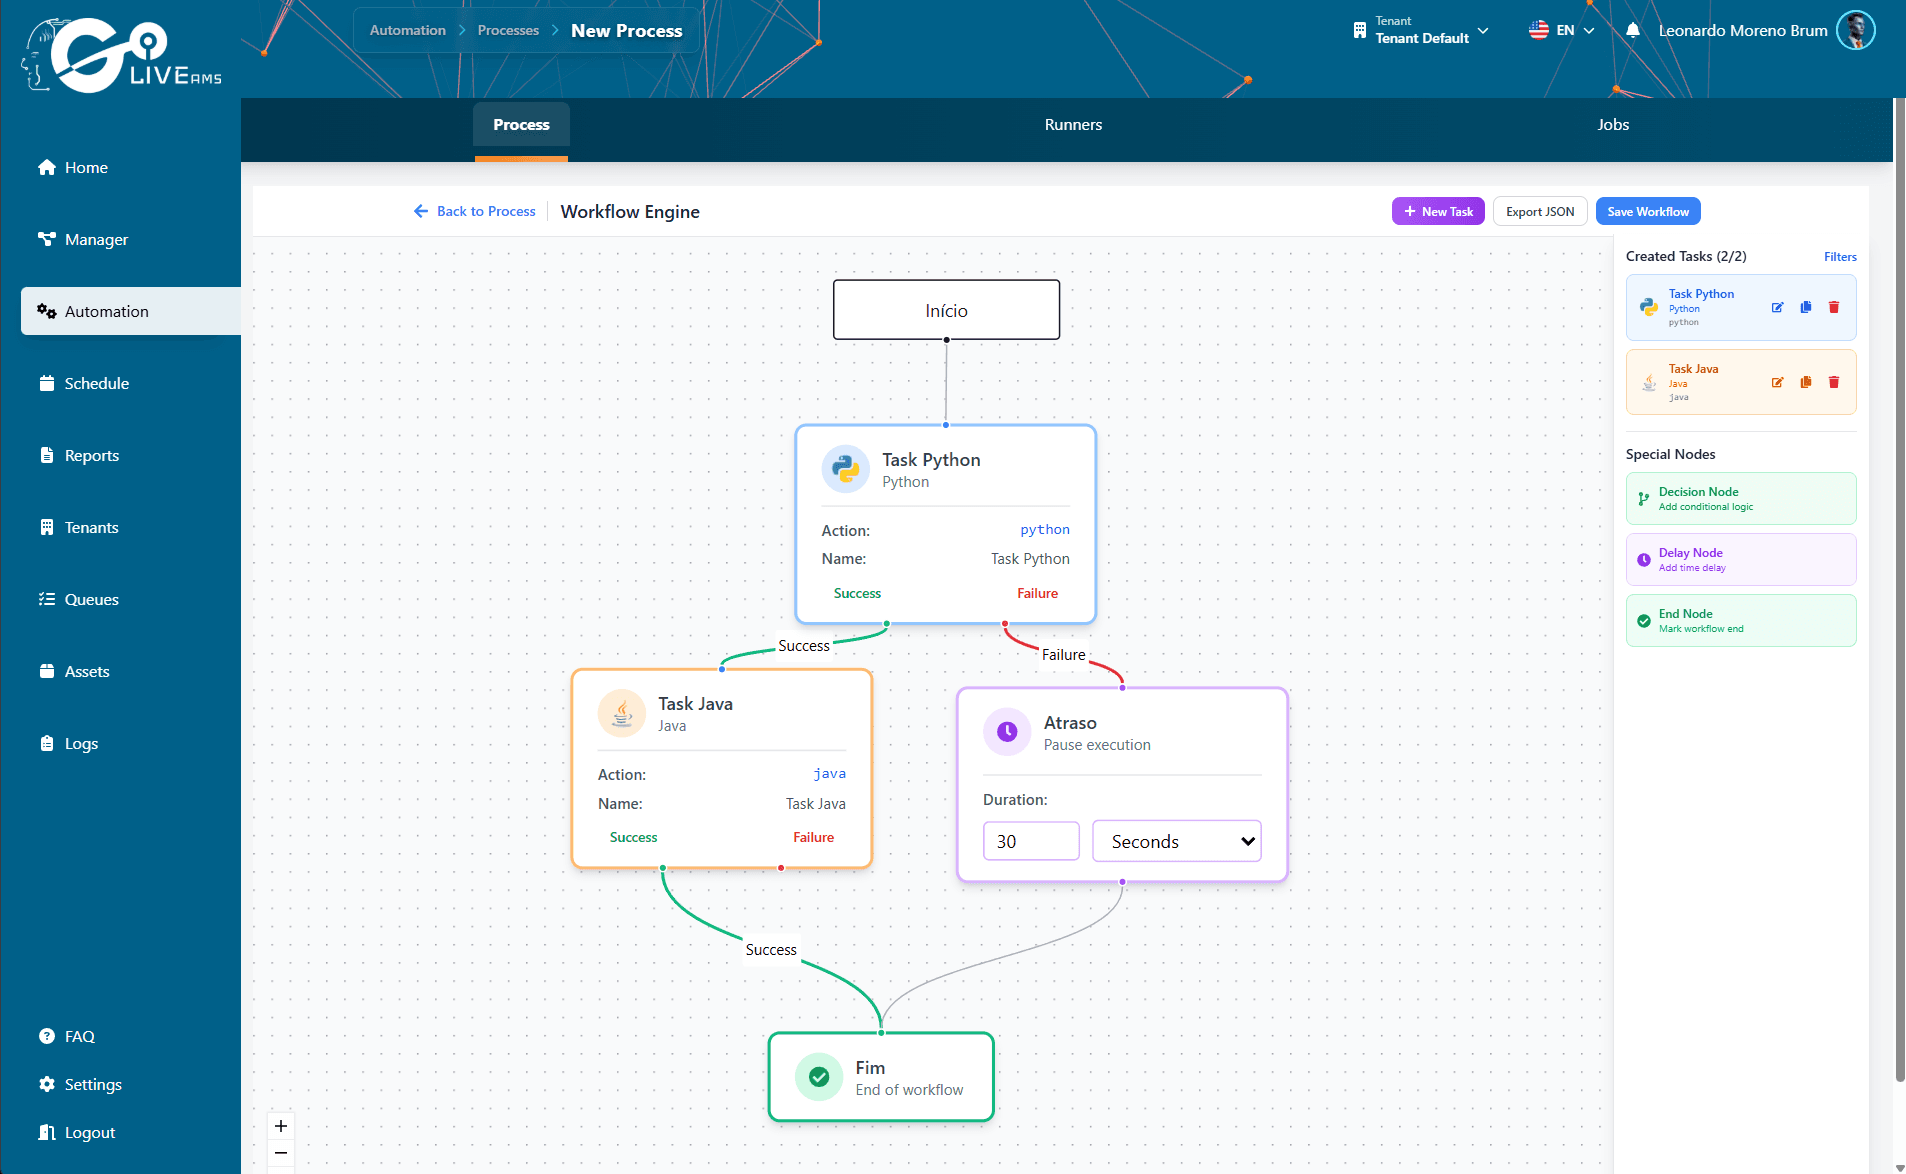
The workflow is the heart of the process. It's where you define what will be executed, in what order and under which conditions. The workflow works as a visual flow editor:
Creating actions in the workflow
An action is an individual task within the workflow. Each action executes something specific — a Python script, a Java program, an Excel spreadsheet, an executable, among others.
Step 1: Open the process workflow
In the process list, click the process you created to open the workflow editor.
Step 2: Create a new action
In the workflow editor, add a new action. Each action has specific fields depending on the type of task it will execute.
Step 3: Configure the action
Fill in the action fields according to the chosen type. For example: for a Python script, you will upload the .py file; for Excel, the .xlsx file; and so on.
Step 4: Add more actions
Repeat the process to create as many actions as you need. Each action will be a node in your workflow.
Connecting actions with conditions
The most powerful part of the workflow is the connection between actions. You can define conditions to control the execution flow:
Practical example: a Python script processes data. If it runs successfully, a Java program generates the report. If the Python script fails, an Excel spreadsheet runs with fallback data.
Tip
Think of the workflow as a flowchart. Each action is a box, and connections are arrows with conditions. You can create simple flows (linear) or complex ones (with branches and error handling).
Defining the workflow end
Every workflow needs an endpoint. You define where the flow ends by connecting the last action (or actions) to the end node. The workflow is fully flexible — you can have multiple endpoints depending on the flow paths.
Complete example
Here's an example of a workflow with 3 actions and conditions:
Start → Action 1 (Python script: process data)
If Python succeeds → Action 2 (Java program: generate report)
If Python fails → Action 3 (Excel spreadsheet: fallback data)
Action 2 (success) → End
Action 3 (success) → End
Summary
To create a process with a complete workflow:
- 1
Go to the Processes section and create a new process (name, description, sector)
- 2
Open the process workflow editor
- 3
Create the necessary actions (Python, Java, Excel, etc.)
- 4
Connect the actions with conditions (success/failure)
- 5
Define the start point and the endpoints of the flow
Next steps
With your process created, you can: