
Managing processing queues
Queues in GoAMS allow you to organize and process items asynchronously, ensuring order and reliability in processing. In this tutorial, you will learn how to create queues, understand their fields and track processed items.
What is a queue?
A queue is a structure that organizes items for processing. Items are added automatically by the system during process execution and are organized in the queue to be processed in order. The queue controls the status of each item and offers features like automatic retry for failed items.
Queues screen
In the "Manage Queues" section of the GoAMS dashboard, you will find the list of all your queues. Each queue displays the following information in the table:
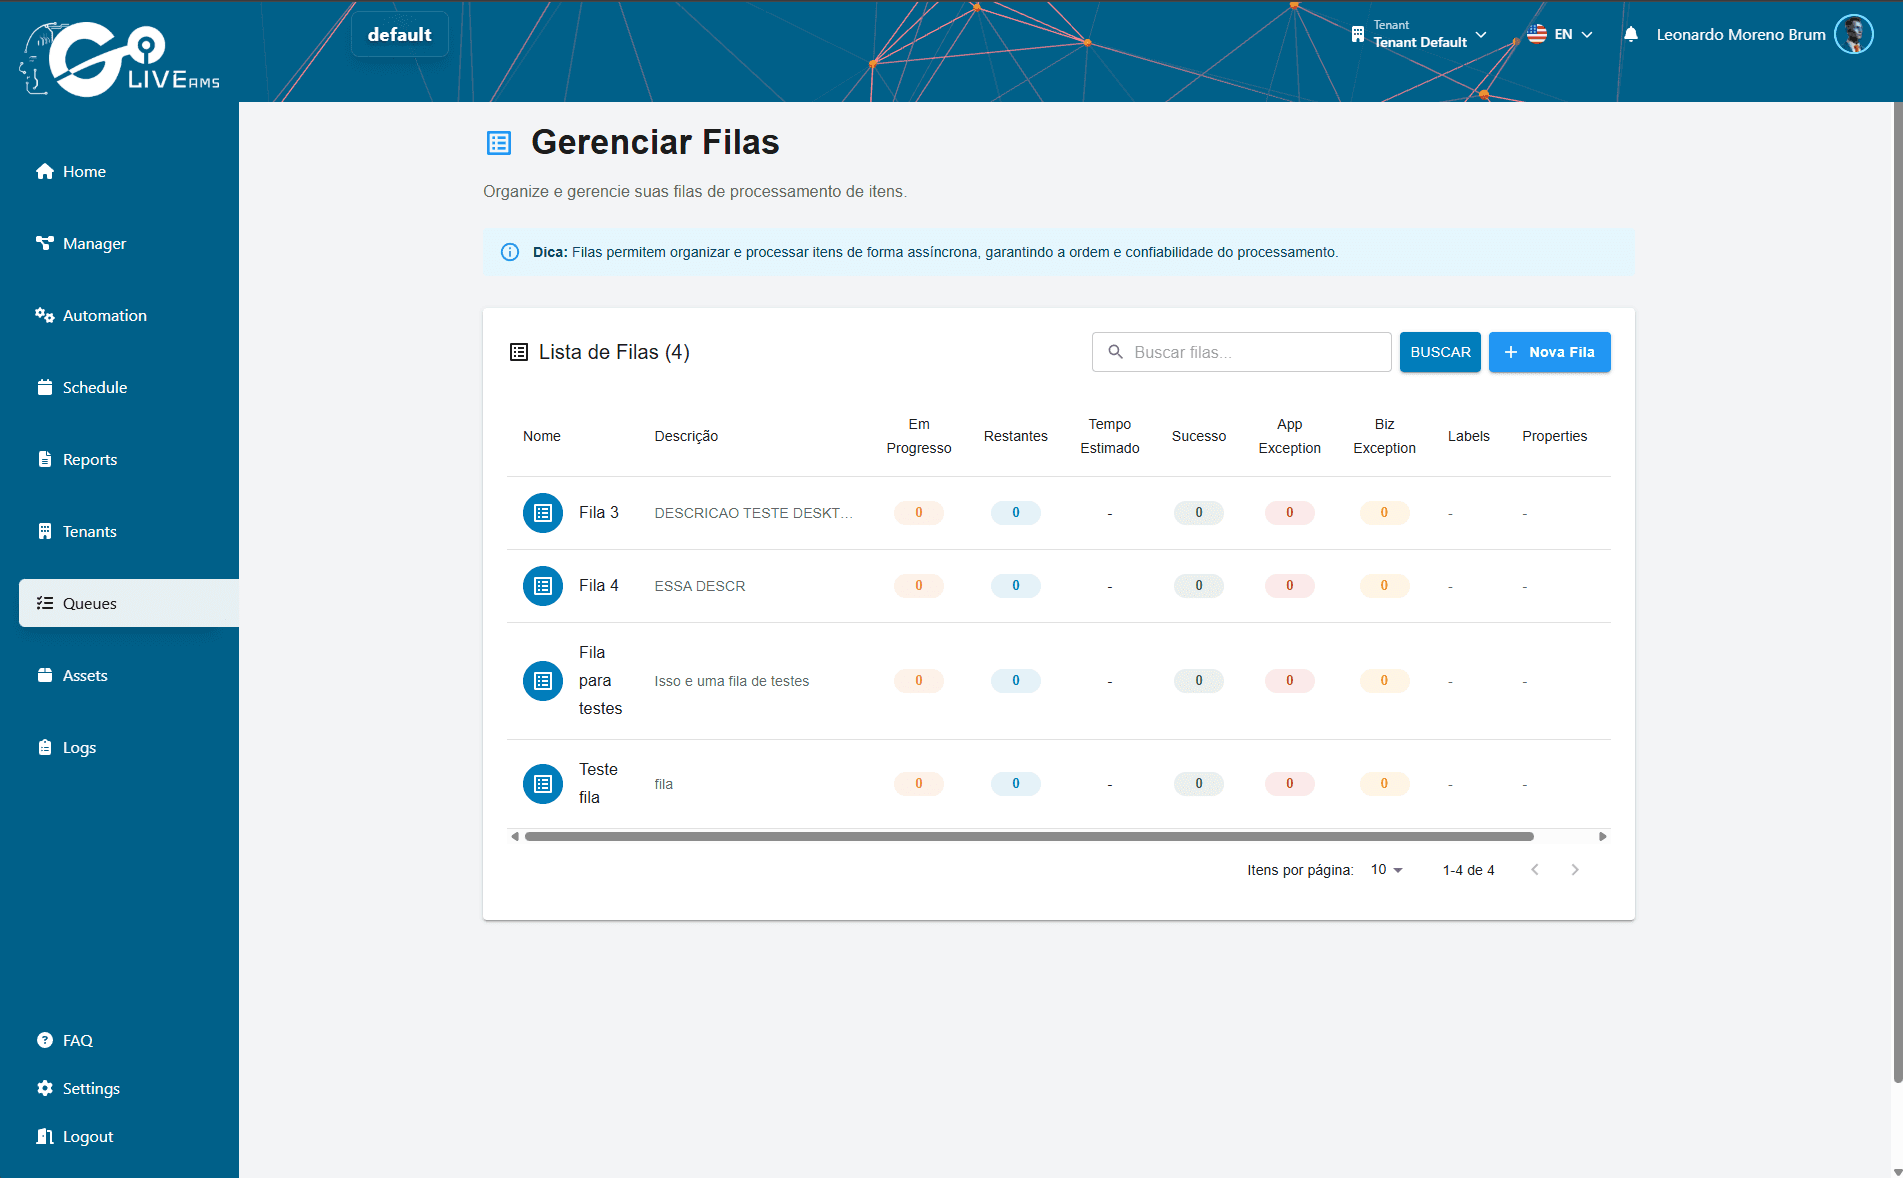
Description — name and description of the queue
In Progress — number of items currently being processed
Remaining — number of items waiting to be processed
Estimated Time — estimated time to process remaining items
Success — number of items successfully processed
App Exception — items that failed due to application errors
Biz Exception — items that failed due to business rules
Labels — tags to categorize the queue
Properties — additional properties of the queue
Creating a new queue
Step 1: Go to the Queues section
In the GoAMS dashboard, go to the "Manage Queues" section. You will see the list of existing queues.
Step 2: Click "New Queue"
Click the "+ New Queue" button in the top right corner. A form will appear.
Step 3: Fill in the general details
Enter the basic queue information:
- Name — required name to identify the queue
- Description — a brief description of what the queue processes (optional)
Step 4: Configure additional options
Set the extra queue configurations:
- Enforce unique references — if enabled, prevents duplicate items in the queue based on a unique reference
Step 5: Configure Auto Retry
Auto Retry allows failed items to be automatically reprocessed:
- Failed items — automatically reprocesses items that failed
- Abandoned items — reprocesses items that were abandoned (timeout or disconnection)
- Max # of retries — maximum number of attempts (minimum 1, maximum 10)
Step 6: Create the queue
Click "Create". The queue will be created and will be immediately available to receive items.
Tip
Use descriptive names for your queues (e.g. "Invoice processing", "Registration validation") to make identification easier when you have multiple queues.
Queue items
Queue items are created automatically by the system during the execution of your processes. You don't create items manually — they appear in the queue as your processes generate them.
Viewing items
When you click on a queue in the list, a side panel opens showing all items in that queue. You can search items by PK (primary key) using the search field.
Item statuses
Each item in the queue has a status that reflects its processing state:
In Progress — the item is currently being processed
Success — the item was processed successfully
App Exception — the item failed due to an application error (e.g. script bug)
Biz Exception — the item failed due to a business rule (e.g. invalid data)
Important
Items are managed by the system. You configure the queue and your processes feed items into it automatically. The queue handles ordering, status tracking and automatic retry.
Summary
To use queues in GoAMS:
- 1
Go to the "Manage Queues" section in the dashboard
- 2
Create a new queue with name and description
- 3
Configure additional options and Auto Retry as needed
- 4
Your processes add items to the queue automatically
- 5
Track item statuses directly in the queue
Next steps
With queues configured, you can: